Summer 2015
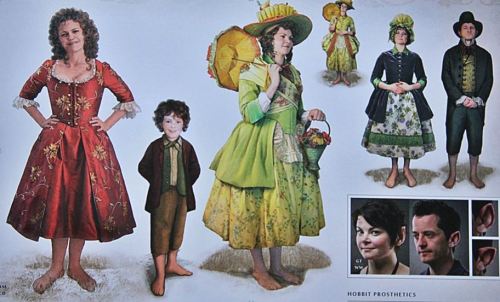
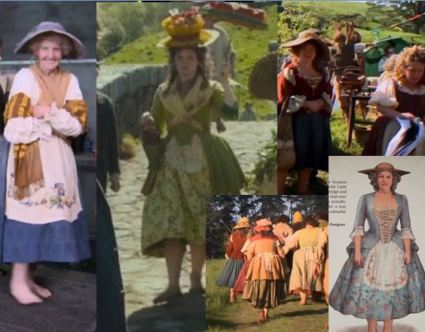
One of Those Ideas brewing for a while was an ensemble based on The Hobbit trilogy (the women in LOTR wear different styles). When I saw the concept art and detailed photographs of the barely-seen-onscreen Hobbit women’s costumes in the Chronicles books put out by Weta, I was smitten.
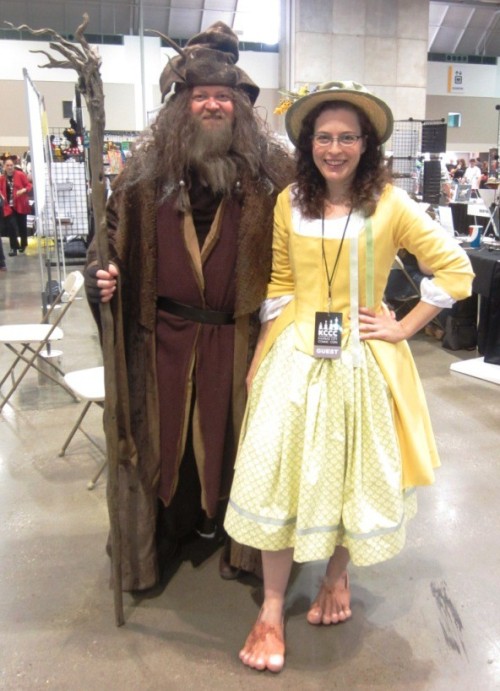
They’re more than a bit inspired by 18th century clothing—one of my very first costuming loves. We don’t have many opportunities to wear or make garb from this era, and I leapt at (well, staggered toward) the chance to wear one of my favorite pieces—my yellow wool caraco—again.
Part of this project is personal: Bunce is, after all, a Hobbit name! Mimosa Bunce is Bilbo’s grandmother. (I am actually one of a long line of literary Bunces.) And since I already had a good start on a mimosa-yellow ensemble (and because Milord has two Middle Earth costumes of his own, and I had none), it all fell into place. More or less.
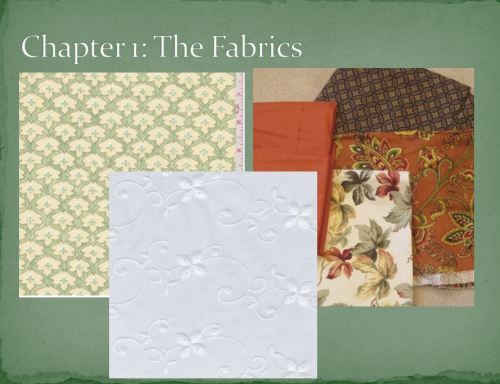
Most of my planning and research went into a project file on Powerpoint, but I have collected some useful links &c on a couple of Pinterest boards: Hobbit garb and 18th-19th Century clothing
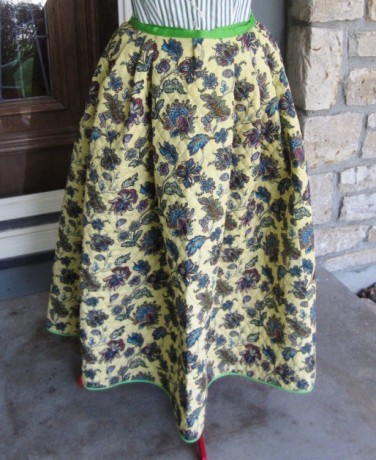
Hobbits are well-to-do, home-loving, cheery folk, and I wanted my ensemble to reflect that. I needed fabrics that looked period appropriate, that were folksy and homey… but also looked rich and country-squire-ish… and also went with yellow. <— And that was the sticking point. So many swatches!! Silks! Plaids! Jacobean prints! Embroidered taffeta! And none of them looked good with my existing caraco. Finally, while shopping for a chemise fabric, I stumbled on this lovely green and yellow print cotton at Denver Fabrics/Fashion Fabrics Club. It was cotton! It was happy! It was perfectly mimosa yellow-and-green! …And it was about $4/yard. When Milord saw it and said, “Wow, that’s it,” I agreed. …And bought way, way, way more than I needed for an entire Shire full of petticoats.
I knew I wanted to use historically-accurate 18th century patterns and construction to achieve the silhouette, so I pulled out some of my favorite resources again. Initially the plan was a complete, skin-out ensemble including new stays and pocket hoops/panniers, but I got distracted by other concerns (new serger!!!!) and projects. I did make a pair of hip pads, based on the pair at the Museum of Fine Arts Boston; as well as a quilted petticoat, using fabulous pre-quilted yardage I found at Hancock, and constructed according to Fitting & Proper by Sharon Ann Burnston:

Yellow cotton hip pads
…Although I did not end up wearing either of them! I couldn’t figure out how/where to wear the hip pads (everything I tried gave an Elizabethan bumroll ledge effect to the skirts, instead of the charming 1700s belling-out shape I wanted). The quilted petticoat was too long, being human-sized, and I was unwilling to shorten it after the trauma of construction (the pleats nearly did me in. I’m not kidding. Nota bene: Always, always, always drape your pleats. Never try to measure them flat. There is only grief and madness that way.).
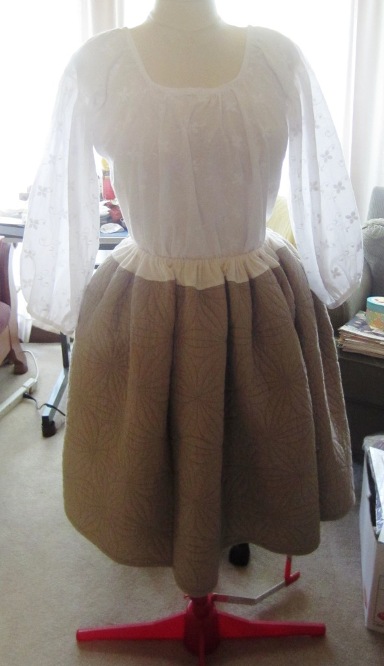
But I loved the quilted petticoat so much that, pleats aside, I instantly decided to make another one!! I found an inexpensive quilted cotton throw at Kohl’s, lopped it in half, serged it back together, gave it a flannel yoke and an elastic casing, and in no time flat: Hobbit petticoat!
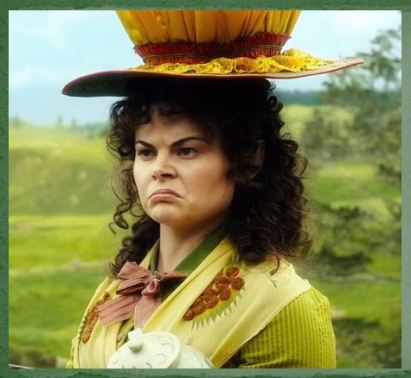
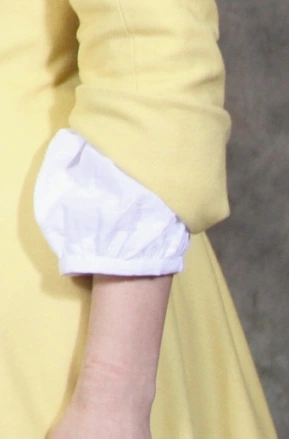
For the chemise, I noticed that Lobelia and some of the other Hobbits had visible shift sleeves, and necklines quite a bit higher than was typical for human women in the 18th century. Sharon Burnston came to my rescue again, with her marvelous article on 18th c. American shifts, which includes a pattern for an extant 1750s shift, with the long, full sleeves. (One trick about those sleeves: To stop them from bunching up uncomfortably inside the fitted jacket sleeves, I attached temporary “stirrups” made of twill tape to the cuffs, which I grasped in my hands to pull the sleeves down as I put the jacket on. Way easier than trying to reach up inside the sleeve with your other hand after the fact!!) I tweaked the neckline for my own purposes, and, of course, shortened the whole thing to Hobbit length.
The chemise fabric is the lovely lightweight cotton eyelet pictured above in the Powerpoint montage. So pretty! It gave just the touch of “specialness” I wanted for the chemise, without it being too high-falutin’ or formal.
After the trauma of two pleated (and then not-pleated) petticoats, I had a little bit of PPSD and put off the final petticoat (skirt) as long as Hobbitly possible. And then! Happiness! While glancing through Meredith Wright’s Everyday Dress of Rural America 1783-1800, I discovered reference to a petticoat that was pleated in front, with a drawstring casing in the back. Brilliant. I can easily pleat half a petticoat (I proved that all too well back in May. It’s the second half that gives me grief! LOL).
Now. That covers the clothing half of this ensemble. But what makes it truly a Hobbit costume, of course, is…
THE FEET!!
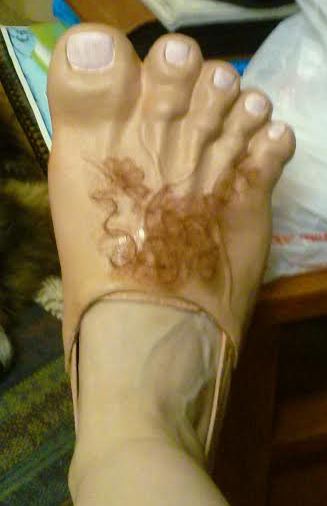
To make my feet, I used ~deeed’s fantastic tutorial on DeviantArt. So perfectly simple, brilliant, and practical. Do go click through, but basically, it’s a set of Hallowe’en vinyl “funny feet” glued to a pair of canvas slip-on shoes. Some of the materials deeed used intimidated me (I wasn’t ready for the learning curve of gap filler), so I used ShoeGoo, readily available anywhere, to glue mine together. Easy-peasy. The vinyl feet really need to be primed (the acrylic paint will crack), but I couldn’t find a good primer/sealer until after the fact. Useful tip: If you need ANY KIND of glue for any hobby project, go to Michaels! They have everything! They had more than JoAnn, Ace, Harbor Freight, and Walmart combined, as well as very helpful signage explaining the various types and applications. They also carry a promising sealer, in their acrylic craft paint section. I used two coats of paint custom-blended to match my own feet, and about four coats of Americana Dura-Clear varnish (in the craft paint section). It worked really, really well to limit cracking and peeling. After a full day at the convention I had a minimum of cracking, and suspect I’d have had even less if the vinyl had been properly prepped.
Because I have the Worst Feet in the World (arthritis, bunions, flat feet, neuromas, you name it), and I have Experience with this Event Center’s Floor of Doom, I was Deeply Suspect of the comfort of the canvas slip-ons on their own. So I ‘Gooed some Dr. Scholl’s gel orthotics inside (I have a massive collection of various insoles & orthotics—see Worst Feet, above—so I just futzed around, mixing & matching until I found a promising match). They were surprisingly not-uncomfortable, walking about on a truly horrible, unforgiving floor, for almost 12 hours.
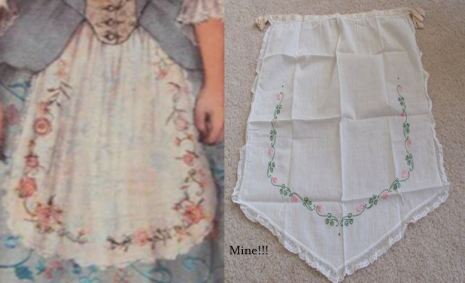
A casual viewer might not have noticed, but another thing all the Hobbit women have in common is sweet little embroidered aprons. They are ubiquitous, and, so I felt, a defining feature of the costume.
Well, I have one, too. A lovely vintage piece I snagged on etsy, after painstakingly studying aprons for weeks:
Great find, right? It’s hand-embroidered in a beautiful clover motif with stemstitch and French knots, with a silk ribbon through worked eyelets at the waistband. I suspect it was intended to be pinned on, but I also suspect it was never worn, and sat folded in a chest for 70 years. I carefully soaked the creases out with Orvus, and lovingly pressed it crisp again.
I was SO excited about that apron! Until two nights before the con, when I finally assembled all the pieces of the costume, and…
I looked like Little Bo Peep.
So very, very wrong.
The original iteration of my hat did not help, either. So GONE were the apron and large-brimmed, beribboned bonnet… and IN was the gingham skirt trim and a more Lobelia-esque hat. Alas.
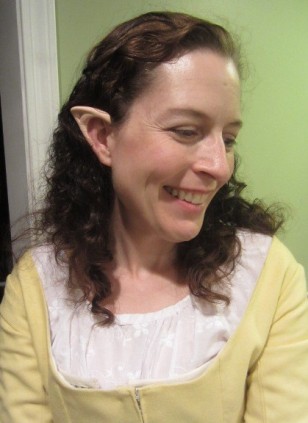
Lastly, and invisibly, were my prosthetic Hobbit ears. Not seen, thanks to my hair and the hat, they were really there! And very fetching, too, I thought, even at the end of a long day:
They’re just the stock licensed version from Rubies, sort-of painted to match my own ears (they do match my foundation, but touch my ears and they get very pink very swiftly!). We used Telisis Beta-Bond Plus as the adhesive, which I liked SO MUCH BETTER than spirit gum. And the adhesive remover comes in a handy spritzer bottle. Win.
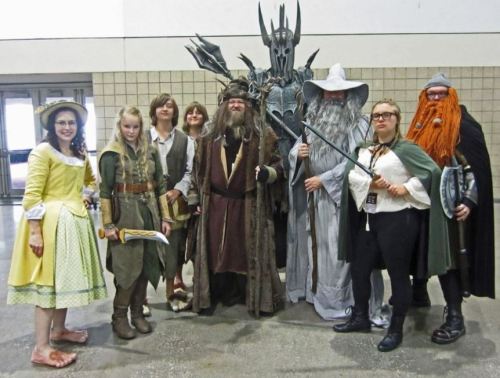
All in all, I am thrilled to pieces with this cosplay. I got to repurpose a favorite piece that I never have a chance to wear; I got to dabble with historical patterns and construction but still play with whatever fun fabrics pleased me, and experimented a bit with vintage pieces, prosthetics, and construction.
The best part, of course, is the reception that successful costumes receive!
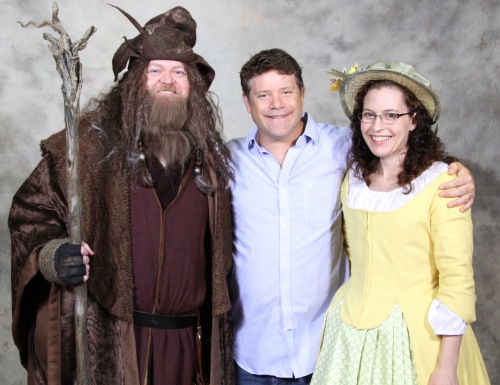
Sean Astin kissed me. Not even kidding. Sam, I’ll be your Rosie Cotton any day. (Sorry, Radagast.)
[…] Check out Elizabeth’s process at her historical costuming blog here. […]